جبهة سد البحر
40°02′35″N 26°10′31″E / 40.0431°N 26.1753°E
| جبهة سد البحر Landing at Cape Helles | |||||||
|---|---|---|---|---|---|---|---|
| جزء من حملة گاليپولي | |||||||
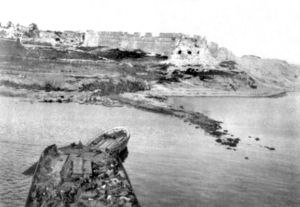 حصن سد البحر كما يبدو من مقدمة السفينة إسإس River Clyde أثناء الإبرار في الشاطئ V | |||||||
| |||||||
| المتحاربون | |||||||
|
|
| ||||||
| القادة والزعماء | |||||||
|
|
| ||||||
| القوى | |||||||
| 21,000 (في فجر 26 أبريل)[1][أ] | 4,500 (4:00 مساء 25 أبريل)[1] | ||||||
| الضحايا والخسائر | |||||||
| ح. 2,000 | 1,898 | ||||||
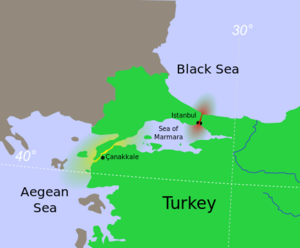
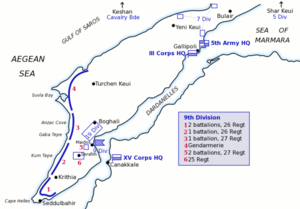
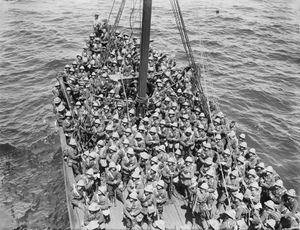
جبهة سد البحر (بالتركية: Seddülbahir Çıkarması؛ إنگليزية: landing at Cape Helles) كانت جزءاً من amphibious invasion of the Gallipoli peninsula by British and French forces on 25 April 1915 during the First World War. Helles, at the foot of the peninsula, was the main landing area. With the support of the guns of the Royal Navy, the 29th Division was to advance ستة ميل (9.7 km) along the peninsula on the first day and seize the heights of Achi Baba. The British were then to go on to capture the forts that guarded the straits of the Dardanelles. A feigned landing at Bulair by the Royal Naval Division and a real landing at Anzac Cove were made to the north at Gaba Tepe, by the Australian and New Zealand Army Corps before dawn and a diversionary landing was made by French forces at Kum Kale on the Asiatic shore of the Straits. After dark another demonstration was made by the French in Besika Bay.
The Helles landing was mismanaged by the British commander, Major General Aylmer Hunter-Weston. V and W beaches became bloodbaths, despite the meagre defences, while the landings at other sites were not exploited. Although the British managed to gain a foothold ashore, their plans were in disarray. For two months the British fought several costly battles to reach the first day objectives but were defeated by the Ottoman army.
خلفية
التطورات العثمانية
At the beginning of the 20th century, the Ottoman Empire was called the sick man of Europe; weakened by political instability, military defeat and civil strife following a century of decline.[2] Power had been seized in 1908 by a group of young officers, known as the Young Turks, who installed Mehmed V as a figurehead Sultan.[3] The new regime implemented a program of reform to modernise the political and economic system and redefine the national character of the empire. Germany provided significant investment and its diplomats gained more influence at British expense, previously the predominant power in the region and German officers assisted in training and re-equipping the army.[4] Despite this support, the economic resources of the empire were depleted by the cost of the First and Second Balkan Wars and the French, British and Germans offered financial aid. A pro-German faction influenced by Enver Pasha, the former Ottoman military attaché in Berlin, opposed the pro-British majority in the Ottoman cabinet and tried to secure closer relations with Germany.[3][5][6] In December 1913, the Germans sent a military mission to Constantinople, headed by General Otto Liman von Sanders. The geographic position of the Ottoman Empire meant that its neutrality in the event of a European war was of significant interest to Russia, France and Britain.[3]
During the July Crisis in 1914, German diplomats offered an anti-Russian alliance and territorial gains in Caucasia, north-west Iran and Trans-Caspia. The pro-British faction in the Cabinet was isolated, due to the British ambassador taking leave until 18 August. As the crisis deepened in Europe, Ottoman policy was to obtain a guarantee of territorial integrity and potential advantages, unaware that the British might enter a European war.[7] On 30 July 1914, two days after the outbreak of the war in Europe, the Ottoman leaders agreed to form the Ottoman-German Alliance in secret against Russia, although it did not require them to undertake military action.[8][9][3] On 2 August, the British requisitioned two modern battleships, Sultân Osmân-ı Evvel and Reşadiye which were being built for the Ottoman Navy in British shipyards, alienating supporters of the British in Constantinople, despite the offer of compensation if they remained neutral.[10] During the strained diplomatic relations between the two empires, the German government offered two cruisers, إسإمإس Goeben and إسإمإس Breslau to the Ottoman navy as replacements. The Allies conducted the Pursuit of Goeben and Breslau which escaped, when the Ottoman government opened the Dardanelles to allow them to sail to Constantinople, despite being required under international law, as a neutral party, to block military shipping.[11]
In September, the British naval mission to the Ottomans, which had been established in 1912 under Admiral Arthur Limpus, was recalled as it appeared that the Ottomans would soon enter the war and command of the Ottoman navy was taken over by Rear Admiral Wilhelm Souchon of the Imperial German Navy.[12][13] On 27 September, the German commander of the Dardanelles fortifications unilaterally ordered the passage to be closed, adding to the impression that the Ottomans were pro-German.[13] The German naval presence and the success of German armies in Europe, gave the pro-German faction in the Ottoman government enough influence to declare war on Russia.[14] On 27 October, Goeben and Breslau, having been renamed Yavûz Sultân Selîm and Midilli, sortied into the Black Sea, bombarded the port of Odessa and sank several Russian ships.[15] The Ottomans refused an Allied demand to expel the German missions and on 31 October 1914, formally entered the war on the side of the Central Powers.[16][15] Russia declared war on Turkey on 2 November, the next day the British ambassador left Constantinople and a British naval squadron off the Dardanelles bombarded the outer forts at Kum Kale and Seddulbahir. A shell hit a magazine, knocked the guns off their mounts and killed 86 soldiers.[17] Britain and France declared war on 5 November and the Ottomans declared a jihad (holy war) later that month, beginning the Caucasus Campaign against the Russians, to regain former Turkish provinces.[18] Fighting also began in Mesopotamia, following a British landing to occupy the oil facilities in the Persian Gulf.[19] The Ottomans prepared to attack Egypt in early 1915, to occupy the Suez Canal and cut the Mediterranean route to British India and the Far East.[20]
استراتيجية الحلفاء والدردنيل
By late 1914, the race to the sea in France, a war of manoeuvre, had ended and trench lines had been dug from the Swiss border to the English Channel.[21] The German Empire and Austria-Hungary closed the overland trade routes between Britain and France in the west and Russia in the east. The White Sea in the Arctic and the Sea of Okhotsk in the Far East, were icebound in winter and distant from the Eastern Front. The Baltic Sea was blockaded by the Kaiserliche Marine (Imperial German Navy) and the entrance to the Black Sea through the Dardanelles was controlled by the Ottoman Empire.[22] While the empire remained neutral, trade with Russia continued but the straits were closed before the Ottomans went to war and in November mine laying was begun in the waterway.[3][23]
Aristide Briand made a proposal in November, to attack the Ottoman Empire, which was rejected and an attempt by the British to pay the Ottomans to join the Allied side also failed.[24] Later that month, Winston Churchill, First Lord of the Admiralty, proposed a naval attack on the Dardanelles, based in part on erroneous reports of Ottoman troop strength. Churchill wanted to use a large number of obsolete battleships, which could not operate against the German High Seas Fleet, for an operation against the Dardanelles, with a small occupation force provided by the army. It was hoped that an attack on the Ottomans would also draw the former Ottoman territories of Bulgaria and Greece into the war, on the Allied side.[25] On 2 January 1915, Grand Duke Nicholas of Russia appealed to Britain for assistance against the Ottomans, who were conducting an offensive in the Caucasus. Planning began for a naval demonstration in the Dardanelles to divert troops from the Caucasian theatre.[26]
تمهيد
التجهيزات الدفاعية العثمانية
خطة الحلفاء
The purpose of the military operation was to assist the fleet to force the Straits, by taking from the rear the Ottoman forts on the European side of the Narrows and to obtain a vantage point, from which the forts on the Asiatic side could be dominated. The objective was the Kilitbahir plateau which covered the Ottoman forts in the Narrows and which ran in a semicircle most of the width of the peninsula, between Maidos and Soghanli Dere. The plateau ran from Kilitbahir westwards for about 4 ميل (6.4 km) was about 2 ميل (3.2 km) wide at its broadest point and 600–800 أقدام (180–240 m) high. The Ottomans had entrenched and wired the plateau and extended the fortifications south to Kakma Dagh ridge on the Straits and north to Gaba Tepe, forming a defensive line where the peninsula was 5 ميل (8.0 km) wide and which dominated the Kilia plain to the south-west.[27]
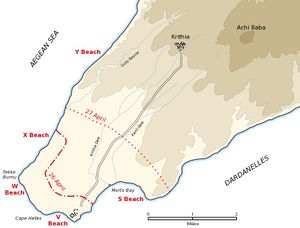
General Sir Ian Hamilton, commander of the MEF chose to make two landings with two diversions. The Anzac Corps would make a surprise landing between Gaba Tepe and Fisherman's Hut, with the covering force landing just before dawn, with no preliminary bombardment. After consolidating the left flank the force was to advance eastwards towards Maidos to cut Ottoman communications with the garrisons further south.[28] On the Gallipoli peninsula on either side of Cape Helles, where the navy could provide support from three sides a covering force of the 86th Brigade and additional units would land and secure the beaches, then the main force would follow up and advance to the first day objectives, the village of Krithia and the hill of Achi Baba.[29] Five beaches were selected for the landing, from east (inside the straits) to west (on the Aegean coast), S, V, W, X and Y beaches. V and W beaches were the main landings at the tip of the peninsula, either side of Cape Helles.[30]
To the north of the Anzac landings a diversion was to be mounted at Bulair. The Royal Naval Division (RND) less two battalions, was to make a demonstration at the narrowest point of the peninsula, to induce the Ottomans to retain forces in the area during the main landings. A naval covering force would bombard the Bulair defences all day and one ship would make a close reconnaissance, with the transports visible in the background.[31] To the south of the landings around Cape Helles, on the Asiatic shore at Kum Kale, a French regiment of the Corps expéditionnaire d'Orient would land temporarily at the same time as the 29th Division at Cape Helles, to distract Ottoman artillery on the Asiatic shore, confuse the Ottoman command and delay the dispatch of reinforcements from the Asia to Gallipoli, before withdrawing to join the main landings on the peninsula.[32] Despite the assurance of a 1905 Admiralty report, that water was plentiful in the valleys, extensive preparations were made to maintain an adequate water supply. In April the Indian 9th Mule Corps arrived from France with 4,316 mules and 2,000 carts and in Egypt a Zion Mule Corps was formed from Jewish Russian émigrés from Palestine. The need for means to carry water was considered so urgent that in mid-April, a request was forwarded to Egypt for the Zion Mule Corps to be sent immediately, regardless of its lack of equipment.[33][ب]
المعركة
العمليات الجوية
The Royal Naval Air Service (RNAS) aircraft of إتشإمإس Ark Royal, co-operated with the Anzac landing with seaplanes and a kite balloon; Number 3 Aeroplane Squadron RNAS, with 18 aircraft, flew in support of the operation at Helles. Standing patrols were maintained over Helles and the Asiatic coast, in perfect flying weather, each pilot making three sorties during the day, beginning at dawn. As soon as Ottoman artillery replied to the landings, the aircraft observers used wireless to direct naval gunfire but were ignored because the quantity of naval gunnery was overwhelmed by the number of Ottoman targets. Once the troops were established ashore, the ships responded to messages from the aircrews who used flare guns to signal to ships unable to receive wireless transmissions. The flyers began bombing artillery, camps and troops, conducted photographic reconnaissance and kept watch on the peninsula up to Bulair and the Asiatic coast. The balloon rose at 5:21 a.m. and the two observers watched the troops climb the cliffs and then reported the presence of the battleship Turgut Reis in the Narrows, which was chased away by إتشإمإس Triumph. The airborne observers were hampered by the steep, scrub-covered hills and sandy gullies but maintained the patrols all day.[36]
الشاطئ V
قوة التغطية
القوة الرئيسية
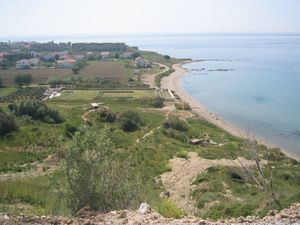
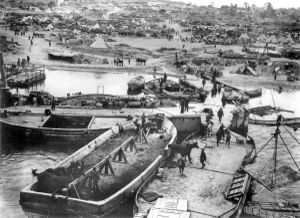
Hunter-Weston had watched the landings on W Beach from إتشإمإس Euryalus 1،000 ياردة (910 m) offshore but received misleading reports at 7:30 and 7:50 a.m. that the landings were succeeding. At 8:30 a.m. Hunter-Weston instructed the main force to land and at 9:00 the second wave waited for the tows to return from the shore, although few arrived. Wounded were removed and several platoons under Brigadier-General Napier sailed towards the beach. The calamity which had befallen the first wave was still unknown to Hunter-Weston, who at 9:00 a.m. had ordered the troops on River Clyde to move towards the left flank and the troops on W Beach. At 9:30 a.m. a company of the 2nd Hampshire tried to disembark but most were shot down on the gangways and the attempt was suspended. The vessel carrying Napier and his party was seen heading towards the beach and was called alongside River Clyde, from where Napier saw many men on the lighters in front of the collier and jumped onto the nearest, unaware that the men were dead. Napier and his staff reached the hopper, were pinned down and Napier was killed a few minutes later. At 10:21 a.m. Hamilton, who had been watching the landing from إتشإمإس Queen Elizabeth, instructed Hunter-Weston to suspend the landing at V Beach and divert the rest of the V Beach force to W Beach.[37]
During the afternoon Queen Elizabeth, إتشإمإس Albion and إتشإمإس Cornwallis bombarded the Ottoman defences on V Beach, which had little effect on the volume of fire directed at the British. During another attempt to land from River Clyde, when the bridge to the shore had been repaired at 4:00 p.m., few troops managed to reach the ledge beyond the beach. At 5:30 p.m. the battleships resumed the bombardment on the village, crest of the ridge and the upper works of the fort and at 7:00 p.m. about 120 men moved to the right flank and attacked the fort, where an Ottoman machine-gun crew repulsed the attack and forced the survivors back under cover. After dark the gangways of River Clyde were cleared of dead and wounded, which took until 3:00 a.m. A surgeon on board the collier treated 750 men from 25–27 April despite being wounded in the foot. Around midnight, Hunter-Weston sent orders to attack Hill 141 but two liaison officers from Hamilton's staff reported that a night attack was impossible; onshore the troops were organised into three parties to attack at 5:00 a.m. after a bombardment by Albion.[38]
The Ottoman defenders had an advantage in fighting from prepared positions, in the absence of surprise or accurate covering fire from the ships but experienced problems with communication and found that the artillery was out of range of the beach. Major Mahmut, the commander of the 3rd Battalion, 26th Regiment, could not find the position of the landing for some time in the confusion. Calls for reinforcements from the 25th Regiment were not met until 1:00 a.m. on 26 April. A platoon commander Abdul Rahman, reported many casualties and at 3:00 p.m. the Ottomans at the fort and on the flank under Sergeant Yaha were forced back. The battalion lost half of its men and the morale of many of the survivors collapsed next day, when outflanked by the troops on S Beach. The Ottomans retired rapidly up the Kirte and Kandilere river beds, abandoning about seventy wounded men. Attempts to rally on the second line of defence failed and the survivors fell back to a line 1.5 كيلومتر (0.93 mi) from Krithia in the late afternoon. By 27 April the beach defenders had lost 575 casualties.[39]
الشاطئ W (إبرار لانكشاير)
قوة التغطية
تشتيت الانتباه
Bulair
Eleven troopships, إتشإمإس Canopus, إتشإمإس Dartmouth and إتشإمإس Doris, two destroyers and several trawlers made rendezvous off Bulair before dawn. The warships began a day-long bombardment just after first light and a destroyer made a close pass off the beach. Later on, ships' boats were swung out from the troopships and lines of eight cutters pulled by trawlers, made as if to land. In the late afternoon men began to embark on the boats, which headed for the shore just before dark and returned after nightfall. During the night, Lieutenant-Commander B. C. Freyberg swam ashore and lit flares along the beach, crept inland and observed the Ottoman defences, which he found to be dummies, returning safely. Just after dawn, the decoy force sailed south to join the main landings.[40]
قومقلعه
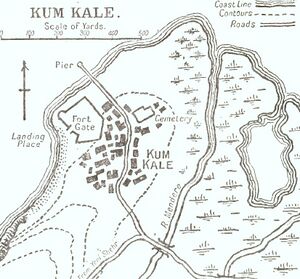
At 5:15 a.m. French battleships Jauréguiberry and Henri IV, with the cruisers Jeanne d'Arc and Latouche-Tréville, the British battleship إتشإمإس Prince George and the Russian cruiser Askold began a bombardment of Kumkale before the 6th Régiment mixte Coloniale landed near the fort, on a small undefended beach but the current flowing from the Dardanelles was so fast, that the landing force reached the beach only at 10:00 a.m. The lack of surprise was compensated for by the long bombardment, on terrain much flatter than that of the peninsula and most of the Ottoman troops were so shaken by the time of the landing, that they had retired across the river. The fort and village of Kum Kale were swiftly occupied with few casualties. The rest of the disembarkation was also delayed by the current but at 5:30 p.m. an advance began towards Yeni Shehr and the Orkanie Mound, where the advances were stopped by the Ottoman defenders. An observation aircraft reported that reinforcements had arrived and the attempt was abandoned. During the night the French illuminated the area with searchlights and Jauréguiberry maintained a slow bombardment. At 8:30 p.m., Ottoman counter-attacks began and continued until dawn, all of them costly failures; the French prepared to resume the advance to Yeni Shehr in the morning.[41]
On 26 April, Ottoman troops captured the Kum Kale cemetery and then 50–60 men advanced with white flags and dropped their weapons. Ottoman and French troops mingled, officers began to parlay and suddenly Capitaine Roeckel was abducted. French troops resumed hostilities but the French and Ottoman infantry were still mixed up and some Ottomans slipped past, occupied several houses and captured two machine-guns. The French re-captured the houses but an attempt to get the guns back was another costly failure. The French concluded that the surrender had been genuine but had then been infiltrated by other troops conducting a ruse. The French shot nine prisoners in reprisal.[42] During the day the Ottoman commander requested reinforcements. By the end of the diversion, French casualties were 778 men and the Ottoman defenders had 1,730 casualties, including 500 missing. By 27 April, the French had landed on the right flank of the British at Helles.[41] After the landings, the Ottoman commander, General Weber Pasha was criticised for being caught unprepared, poor tactics, communication failures and leadership, although the flat terrain had made accurate bombardment from offshore much easier.[42][ت] An Ottoman artillery battery at Tepe caused severe casualties during the departure, and Savoie sailed inshore to bombard the Ottomans.[43]
خليج بشيك
On the night of 25/26 April, six French troop transports, with two destroyers and a torpedo boat, appeared off Besika Bay (now Beşik Bay). The warships commenced a bombardment and boats were lowered from the transports, to simulate a disembarkation. At 8:30 a.m., the cruiser Jeanne d'Arc arrived and joined in the bombardment, before the force was recalled to Tenedos at 10:00 a.m. The Ottoman garrison was detained in the area until 27 April, although the Turkish Official Account recorded that the landings at Kum Kale and the demonstration at Besika Bay had been recognised as ruses. Transfers of troops from the Asiatic shore was delayed by lack of boats and the fear of Allied submarines, rather than apprehension about landings on the Asiatic side. It was not until 29 April, that troops from the area appeared on the Helles front.[44]
الأعقاب
تحليل
In 2001, Travers wrote that the fire power of the modern Ottoman weapons and resilience of field fortifications, caused many Allied losses, particularly at V and W beaches. There was much criticism of Hamilton, for not ordering Hunter-Weston to send more troops to Y Beach but this was not due to Hamilton leaving discretion to his subordinate, since Hunter-Weston was ordered to divert part of the main force from V to W Beach at noon. Conditions at V Beach were not known to Hamilton, until he had been in contact with Hunter-Weston and interfering with the landing plan, could have added to the delays in landing troops. Hunter-Weston concentrated on the landings at V and W beaches and later on Hill 138, which was consistent with the tendency of generals on the Western Front to dwell on areas where enemy resistance was strongest and to reinforce failure. Travers wrote that the French landing at Kum Kale had been overlooked yet had been one of the most successful, despite initial Ottoman confidence that the landing would be defeated by the four battalions concentrated nearby. The Ottoman XV Corps commander General Weber Pasha was criticised for being unprepared, poor communications, tactics and leadership, when fighting in flatter terrain than that on the peninsula, on which the French artillery was able to dominate the Ottoman infantry. Despite this advantage, the French advance was stopped by the Ottomans on 26 April, in a costly defensive action.[45]
The landings at S, X, Y and Kum Kale were the most successful, through surprise, close naval support and the inability of the Ottomans to garrison all of the coast, only the most obviously vulnerable points. The main landings at V and W beaches were the most costly. Naval ships which moved close inshore to bombard the Ottoman positions had some effect and at W Beach were able to suppress Ottoman return fire, after the early British losses. At V Beach the bombardments had less effect and the ploy of landing from River Clyde failed, leaving the survivors stranded until 26 April. The landing at Y Beach was a success because it was unopposed, yet the difficulty of bombarding the high ground was the cause of much of the British difficulty. Travers also listed inexperience and technical inadequacy, which left the senior commanders stuck aboard ship and the commanders who went ashore, becoming casualties. While greatly outnumbered, the Ottomans made good use of their field fortifications, machine-guns and rifles to defend the beaches and obstruct any advance inland.[46]
In 1929, C. F. Aspinall-Oglander, the British Official Historian wrote that in the course of the Gallipoli campaign, the MEF failed to reach its first day objectives but that the plan to advance to Achi Baba had a reasonable chance of success. He wrote that the main reason for the failure, lay in the unusual number of senior officers who became casualties. From the beginning of the landings, the 29th Division lost two of three brigadiers, two of three brigade majors and most of the senior officers in the 41⁄2 battalions of the covering force, which landed at X, W and V beaches. Oglander also wrote that making landings on small beaches with few boats, required elaborate and rigid instructions, if the passage from ship to shore was to be efficient and the plans laid by the army and navy staffs and the headquarters of the 29th Division had been excellent but left very little discretion, should the landings not meet equal success. The commanders on Y and S beaches had been ordered to wait for the advance from the main beaches and join in the attack on Achi Baba. No provision was made for an attack towards the main beaches to give assistance, yet the number of troops landed on the minor beaches exceeded the size of the Ottoman garrison at the south end of the peninsula.[47]
The failure to contemplate the possibility, that the troops at Y and S beaches might need to support the main landings, also exposed the failure to retain a reserve under the control of the Commander-in-Chief. Oglander speculated that had there been two battalions available, to land at the weakest point that the main landings had revealed in the Ottoman defences, Helles and Sedd el Bahr would have fallen by midday. Such a manoeuvre would have needed good communication between land and sea but the difficulty was underestimated and hampered British operations all day. The obvious difficulties of moving troops in open boats by instalments had been distracting, particularly the moments between disembarkation and reaching the shore, despite the confidence of the navy in its plans for bombardment. The apprehension was justified and the landing at V Beach was only saved from catastrophe by the covering fire of the machine-guns on River Clyde; defeat at W Beach was only averted by turning the Ottoman right flank. Lack of experience of opposed landings under modern conditions, made it difficult to rally scattered units and the challenge of organising an advance inland was underestimated. It had been a mistake not to stress to all members of the landing force, that there would be little time to move inland before Ottoman reinforcements arrived.[48]
The landing plan had been based on the importance of maintaining liaison between the army and navy, which had led to a decision that the 29th Division headquarters should stay aboard Euryalus and that Hamilton and the MEF headquarters should remain on Queen Elizabeth, the flagship of the naval commander-in-chief. Despite the efforts of the navy, Hunter-Weston and the 29th Division headquarters were out of contact with the landing forces for most of the day, despite being barely 1-ميل (1.6 km) from the front line. When Queen Elizabeth was needed to bombard V Beach, Hamilton was isolated there, from the afternoon to the evening of 25 April, incapable of intervening anywhere else. Oglander suggested that a separate communications vessel should have been prepared for the army and navy staffs, equipped with signalling apparatus to maintain touch with the landing forces, free from other demands for its services.[49]
The stress and exhaustion of the landings and the unknown nature of the environment ashore combined with officer casualties left some of the units of the 29th Division to be in great difficulty by the afternoon, unaware that the Ottoman defenders were in an equally demoralised state. Before the invasion Hunter-Weston had printed a "Personal Note" to each soldier in the division to explain the hazards of the landing as a forewarning, writing of
Heavy losses by bullets, by shells, by "mines" and by drowning....
— Hunter-Weston[50]
to which the troops would be exposed.[50] In the southern landings, the British landed 121⁄2 battalions by 1:00 p.m., against a maximum of two Ottoman battalions and Oglander wrote that the failure at V Beach caused the failure of the British plan to reach Achi Baba. The Ottoman defenders were too few to defeat the invasion but the leadership of Sami Bey, who sent the few reinforcements available to the 26th Regiment, gave orders to drive the British into the sea, a simple instruction which all could understand. The company at Sedd el Bahr endured the naval guns and held on to the position all day, being reinforced by about two companies. Overnight, the small parties of Ottoman infantry at W and X beaches contained the British and by 8:00 a.m. on 26 April had compelled the abandonment of Y Beach.[51]
الخسائر
Oglander wrote that the Turkish Official Account recorded 1,898 Ottoman casualties, from the five battalions south of Achi Baba before morning on 27 April, in the first two days of the landings at Cape Helles.[52] John Keegan in 1998, wrote that British casualties at Cape Helles during the morning were ح. 2,000 men.[53] The 1st Royal Dublin Fusiliers and 1st Royal Munster Fusiliers re-formed a composite battalion, known as the Dubsters and the original battalions were reformed after the evacuation.[54] The Munsters moved to the 48th Brigade in the 16th (Irish) Division in May 1916 and were joined by the Dubliners in October 1917.[55] Of the 1,100 Dubliners, eleven survived the Gallipoli campaign unscathed.[56]
Subsequent operations
The Allied attack began at 8:00 a.m. on 28 April with a naval bombardment. The plan of advance was for the French to hold position on the right, while the British line would pivot and capture Krithia and Achi Baba from the south and west. The plan was poorly communicated to the brigade and battalion commanders of the 29th Division. Hunter-Weston remained in the rear and was not able to exert any control as the attack developed. The initial advance was swift but pockets of Ottoman resistance were encountered, in some places the advance was stopped and at others kept moving, leaving both sides outflanked, which was more of a disadvantage to the attackers. As the British and French advanced, the terrain became more difficult, as the troops reached four great ravines, which ran from the heights around Achi Baba towards the cape.[57]
On the left flank, two battalions of the 87th Brigade (1st Border Regiment and 1st Royal Inniskilling Fusiliers) entered Gully Ravine but were halted by a machine-gun post near Y Beach. No further advance could be made up the ravine until the 1/6th Gurkha Rifles captured the post on the night of 12/13 May, which involved them climbing a 300-قدم (91 m) vertical slope, which had defeated the Royal Marine Light Infantry and the Royal Dublin Fusiliers; the site became known as "Gurkha Bluff". Exhausted, demoralised and virtually leaderless British troops could go no further, in the face of increasing Ottoman resistance and in places, Ottoman counter-attacks drove the French and British back to their starting positions. By 6:00 p.m. the attack had been called off.[58] Of ح. 14,000 Allied troops involved, 2,000 British and 1,001 French casualties were suffered.[59]
ملاحظات
- ^ At 4:00 p.m. on 25 April, there were 4,500 Ottomans present. By dawn on 26 April, 21,000 British troops are estimated to have landed near Helles.[1]
- ^ The Zion Mule Corps under Lieutenant-Colonel J. H. Patterson, landed at Helles from 27–28 April, four weeks after being raised, having been stranded at Mudros when its ship ran aground. The corps was embarked in the same ship as the 9th Mule Corps bound for Gaba Tepe and so a detour to Helles was ordered. The mule corps was disembarked under artillery fire from the Asiatic shore, with help of volunteers from the 9th Mule Corps and began carrying supplies forward immediately.[34] In May, Private M. Groushkowsky prevented his mules from stampeding under heavy bombardment and despite being wounded in both arms, delivered the ammunition, for which he was awarded a Distinguished Conduct Medal. Captain Trumpeldor was shot through the shoulder but refused to leave the battlefield.[35]
- ^ At a meeting on Queen Elizabeth at noon on 26 April, d'Amade and Hamilton decided to end the diversion. After representations by the navy, Hamilton changed his mind and at 5:30 p.m., asked the French to continue the landing. Another version of events held that the French were impatient to end the diversion and refused the request to remain. French records have no request and the re-embarkation began at 11:00 p.m.[43]
الهامش
- ^ أ ب ت Patton 1936, p. 33.
- ^ Fewster, Basarin & Basarin 2003, p. 36.
- ^ أ ب ت ث ج Haythornthwaite 2004, p. 6.
- ^ Howard 2002, pp. 51–52.
- ^ Aspinall-Oglander 1929, pp. 1–11.
- ^ Fewster, Basarin & Basarin 2003, pp. 37–41.
- ^ Aspinall-Oglander 1929, pp. 6–7.
- ^ Broadbent 2005, pp. 17–18.
- ^ Fewster, Basarin & Basarin 2003, p. 41.
- ^ Howard 2002, p. 52.
- ^ Broadbent 2005, p. 18.
- ^ Broadbent 2005, pp. 9, 18.
- ^ أ ب Haythornthwaite 2004, p. 7.
- ^ Howard 2002, p. 53.
- ^ أ ب Fewster, Basarin & Basarin 2003, p. 44.
- ^ Broadbent 2005, p. 19.
- ^ Carlyon 2001, p. 47.
- ^ Carlyon 2001, p. 48.
- ^ Holmes 2001, p. 577.
- ^ Keegan 1998, p. 238.
- ^ Dennis et al. 2008, p. 224.
- ^ Corbett 2009a, pp. 158, 166.
- ^ Carlyon 2001, p. 34.
- ^ Strachan 2003, p. 115.
- ^ Broadbent 2005, pp. 27–28.
- ^ Travers 2001, p. 20.
- ^ Corbett 2009, pp. 304–305.
- ^ Aspinall-Oglander 1929, p. 170.
- ^ Corbett 2009, pp. 307–310.
- ^ Corbett 2009, pp. 312–313.
- ^ Jerrold 2009, pp. 77–79.
- ^ Aspinall-Oglander 1929, pp. 133–134.
- ^ Aspinall-Oglander 1929, p. 122.
- ^ Alexander 1917, pp. 146–148, 154.
- ^ Patterson 1916, pp. 210, 123–124, 204.
- ^ Jones 2002, pp. 44–46.
- ^ Aspinall-Oglander 1929, pp. 238–240.
- ^ Aspinall-Oglander 1929, pp. 246–249.
- ^ Travers 2001, pp. 69–70.
- ^ Aspinall-Oglander 1929, pp. 163–165.
- ^ أ ب Aspinall-Oglander 1929, pp. 257–263.
- ^ أ ب Travers 2001, p. 77.
- ^ أ ب Travers 2001, pp. 77–78.
- ^ Aspinall-Oglander 1929, p. 264.
- ^ Travers 2001, pp. 55, 75–77.
- ^ Travers 2001, pp. 77–79.
- ^ Aspinall-Oglander 1929, pp. 251–252.
- ^ Aspinall-Oglander 1929, pp. 252–253.
- ^ Aspinall-Oglander 1929, pp. 253–254.
- ^ أ ب Aspinall-Oglander 1929, p. 254.
- ^ Aspinall-Oglander 1929, pp. 254–255.
- ^ Aspinall-Oglander 1929, p. 279.
- ^ Keegan 1998, p. 265.
- ^ Aspinall-Oglander 1929, p. 318.
- ^ Bredin 1987, p. 446; Chappell 2008, p. 225.
- ^ Thys-Şenocak & Aslan 2008, p. 30.
- ^ Aspinall-Oglander 1929, pp. 288–290.
- ^ Aspinall-Oglander 1929, pp. 290–295.
- ^ Aspinall-Oglander 1929, p. 294.
المراجع
Books
- Alexander, H. M. (1917). On Two Fronts: Being the Adventures of an Indian Mule Corps in France and Gallipoli. London: Heinemann. OCLC 12034903. Retrieved 28 May 2014.
{{cite book}}: CS1 maint: ref duplicates default (link) - Aspinall-Oglander, C. F. (1929). Military Operations Gallipoli: Inception of the Campaign to May 1915. History of the Great War Based on Official Documents by Direction of the Historical Section of the Committee of Imperial Defence. Vol. I (1st ed.). London: Heinemann. OCLC 464479053.
{{cite book}}: CS1 maint: ref duplicates default (link) - Bredin, Alexander Edward Craven (1987). A History of the Irish Soldier. Belfast: Century Books. ISBN 9780903152181.
{{cite book}}: CS1 maint: ref duplicates default (link) - Broadbent, H. (2005). Gallipoli: The Fatal Shore. Camberwell, Victoria: Viking/Penguin. ISBN 0-670-04085-1.
{{cite book}}: CS1 maint: ref duplicates default (link) - Carlyon, L. (2001). Gallipoli. Sydney: Pan Macmillan. ISBN 0-7329-1089-7.
{{cite book}}: CS1 maint: ref duplicates default (link) - Chappell, Brad (2008). The Regimental Warpath 1914–1918. Ravi Rikhye. ISBN 9780977607273.
{{cite book}}: CS1 maint: ref duplicates default (link) - Corbett, J. S. (2009) [1920]. Naval Operations. History of the Great War Based on Official Documents by Direction of the Historical Section of the Committee of Imperial Defence. Vol. I (Naval & Military Press ed.). London: Longmans. ISBN 978-1-84342-489-5. Retrieved 28 May 2014.
- Corbett, J. S. (2009) [1929]. Naval Operations. History of the Great War based on Official Documents by Direction of the Historical Section of the Committee of Imperial Defence. Vol. II (2nd ed.). London: Longmans. ISBN 978-1-84342-490-1. Retrieved 28 May 2014.
- Dennis, P.; et al. (2008). The Oxford Companion to Australian Military History (2nd ed.). Melbourne: Oxford University Press. ISBN 978-0-19-551784-2.
- Fewster, K.; et al. (2003) [1985]. Gallipoli: The Turkish Story. Crows Nest, New South Wales: Allen & Unwin. ISBN 1-74114-045-5.
{{cite book}}: CS1 maint: ref duplicates default (link) - Gillon, S. (2002) [1925]. The Story of the 29th Division, A Record of Gallant Deeds (Naval & Military Press ed.). London: Thomas Nelson. ISBN 1-84342-265-4.
- Haythornthwaite, P. (2004) [1991]. Gallipoli 1915: Frontal Assault on Turkey. Campaign Series. London: Osprey. ISBN 0-275-98288-2.
{{cite book}}: CS1 maint: ref duplicates default (link) - Holmes, R., ed. (2001). The Oxford Companion to Military History. Oxford: Oxford University Press. ISBN 0-19-866209-2.
{{cite book}}: CS1 maint: ref duplicates default (link) - Howard, M. (2002). The First World War. Oxford: Oxford University Press. ISBN 0-19-285362-7.
{{cite book}}: CS1 maint: ref duplicates default (link) - Jerrold, D. (2009) [1923]. The Royal Naval Division (Naval & Military Press ed.). London: Hutchinson. ISBN 978-1-84342-261-7.
- Jones, H. A. (2002) [1928]. The War in the Air: Being the Story of the Part Played in the Great War by the Royal Air Force. History of the Great War based on Official Documents by Direction of the Historical Section of the Committee of Imperial Defence. Vol. II (Naval & Military Press ed.). Oxford: Clarendon Press. ISBN 1-84342-413-4. Retrieved 28 May 2014.
- Keegan, J. (1998). The First World War. London: Pimlico. ISBN 0-7126-6645-1.
{{cite book}}: CS1 maint: ref duplicates default (link) - Patterson, J. H. (1916). With the Zionists in Gallipoli. London: Hutchinson. OCLC 466253048. Retrieved 27 May 2014.
{{cite book}}: CS1 maint: ref duplicates default (link) - Thys-Şenocak, Lucienne; Aslan, Carolyn (2008). Rakoczy, Lila (ed.). The Archaeology of Destruction. Newcastle: Cambridge Scholars. ISBN 978-1-84718-624-9.
{{cite book}}: CS1 maint: ref duplicates default (link) - Snelling, Stephen (1995). Gallipoli. VCs of the First World War. Stroud: Alan Sutton. ISBN 9780750905664.
{{cite book}}: CS1 maint: ref duplicates default (link) - Steel, N.; Hart, P. (2002) [1994]. Defeat at Gallipoli (repr. ed.). London: Pan Books. ISBN 0-330-49058-3.
- Strachan, H. (2003) [2001]. The First World War: To Arms. Vol. I (paperback repr. ed.). Oxford: Oxford University Press. ISBN 0-19-926191-1.
- Travers, Tim (2001). Gallipoli 1915. Stroud: Tempus. ISBN 0-7524-2551-X.
{{cite book}}: CS1 maint: ref duplicates default (link)
مواقع إلكترونية
- Eastwood, J.; Boutty, C. (2001). "Feature Page of Sgt Alfred Joseph Richards V.C". XX Lancashire Fusiliers. Retrieved 8 June 2014.
{{cite web}}: CS1 maint: ref duplicates default (link) - Lord, C. (2014). "Gallipoli VC's". Gallipoli Association. Archived from the original on 23 أكتوبر 2014. Retrieved 5 يونيو 2014.
{{cite web}}: CS1 maint: ref duplicates default (link) - Stewart, I. (21 July 2005). "The Victoria Cross awarded to Sergeant Alfred Richards, 1 Bn, Lancashire Fusiliers, has been sold at auction by Spink of London for a Hammer Price of £110,000". The Victoria Cross, Britain's Highest Award for Gallantry. Retrieved 17 December 2006.
{{cite web}}: CS1 maint: ref duplicates default (link)
للاستزادة
| مراجع مكتبية عن the Gallipoli Campaign |
Books
- Bean, C. E. W. (1921). The Story of ANZAC from the Outbreak of War to the End of the First Phase of the Gallipoli Campaign, May 4, 1915. Official History of Australia in the War of 1914–1918. Vol. I (11th, 1941 ed.). Sydney: Angus and Robertson. OCLC 220878987. Retrieved 26 May 2014.
- Callwell, C. E. (1919). The Dardanelles. Campaigns and their Lessons. London: Constable. OCLC 362267054. Retrieved 28 May 2014.
- Cooper, B. (1918). The Tenth (Irish) Division in Gallipoli (1st ed.). London: Herbert Jenkins. OCLC 253010093. Retrieved 5 June 2014.
- Hamilton, I. S. M. (1920). Gallipoli Diary. Vol. I. London: Edward Arnold. OCLC 816494856. Retrieved 28 May 2014.
- Hamilton, I. S. M. (1920). Gallipoli Diary. Vol. II. London: Edward Arnold. OCLC 816494856. Retrieved 28 May 2014.
- Sanders, O. V. K. Liman von (1919). Fünf Jahre Türkei [Five Years in Turkey] (in German) (1st ed.). Berlin: Scherl. OCLC 69108964. Retrieved 6 June 2014.
{{cite book}}: CS1 maint: unrecognized language (link)
المواقع الإلكترونية
- "Gallipoli Part II: The First Day on the Peninsula". Turkey in the First World War.com. Retrieved 17 September 2006.[dead link]
- "Gallipoli Day, Royal Regiment of Fusiliers". United Kingdom Ministry of Defence. Archived from the original on 28 July 2006. Retrieved 17 September 2006.
- Sugarman, M. (1999). "The Zion Muleteers of Gallipoli (March 1915 – May 1916)". The American-Israeli Cooperative Enterprise. Jewish Virtual Library. Retrieved 27 May 2014.
وصلات خارجية
- Pages using gadget WikiMiniAtlas
- Short description is different from Wikidata
- Coordinates on Wikidata
- Articles containing إنگليزية-language text
- Pages using Lang-xx templates
- Articles with hatnote templates targeting a nonexistent page
- Articles containing فرنسية-language text
- CS1 maint: ref duplicates default
- Articles with dead external links from December 2017
- Pages with empty portal template
- نزاعات 1915
- 1915 في الدولة العثمانية
- معارك حملة گاليپولي
- معارك الحرب العالمية الأولى التي شاركت فيها المملكة المتحدة
- معارك الحرب العالمية الأولى التي شاركت فيها الدولة العثمانية
- Amphibious operations of World War I
- أحداث أبريل 1915
